How to Start a WordPress Blog
WordPress Blog is one of the many exciting features of WordPress websites, and if you are not using it, then you are foolish. Other than the well-seen aspect of how Blogging helps in SEO, and organizations that incorporate blogs — especially when paired with recruitment marketing tools or other digital strategies — generate 67% more leads than firms that don’t double their content marketing efforts by adding a blog to their mix. Fortunately, Start a WordPress Blog is a rather easy endeavor to address.
How to Use WordPress Start a WordPress Blog
- Create a fresh post.
- Include material.
- Structure the article.
- Check out the post beforehand.
- Post the article.
1. Create a fresh post
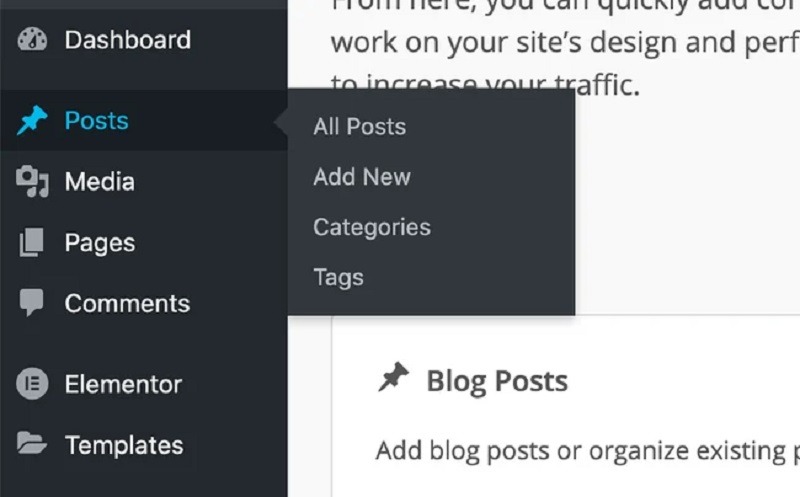
To start your WordPress blog, write a post as soon as you can. We’ve made a sample to refer to when you start using your WordPress blog. Enter your WordPress administrator credentials first, then choose Posts from the menu on the left. Next, select All Posts from the dialog box that displays.
There may be times when you need to choose more than one post at once as your blog grows in material. On the All Posts webpage, you may choose the Bulk Actions button to complete this.
2. Include material
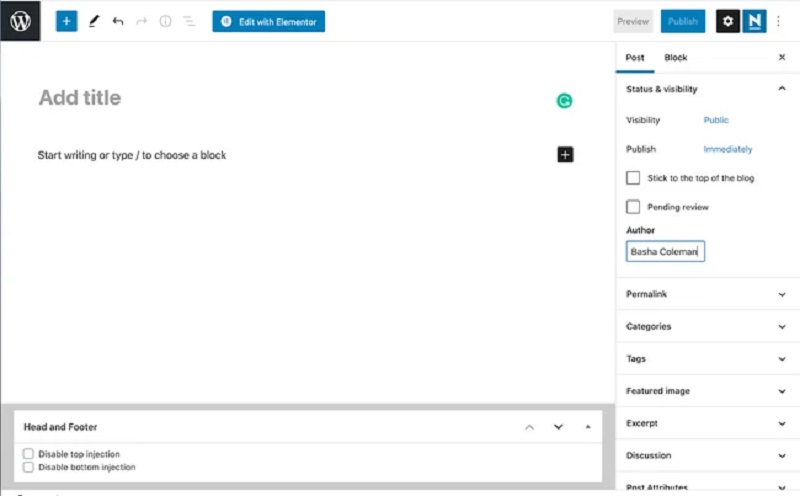
You’ve reached the blank canvas where your material, or masterpiece, will be added. But first, a few guidelines before we get started. Initially, make sure you regularly save your work or write it in a different Word or Google document that you then transfer to the content management systems (CMS). This is a smart move since, even though WordPress automatically saves your work, it might not remember changes you make if you lose internet access. In addition, it’s a good idea to write your material in a different document to avoid becoming overwhelmed with formatting, editing, and writing at the same time.
Use the Save draft option, which is in the upper right corner, to save.
WordPress has a block editor that functions precisely as you might expect: it creates blocks for every new content section you add. For instance, headlines and graphics will be divided into blocks, as will paragraphs.
Adding Pictures
You must include photos in your WordPress blog post once you’ve finished writing your first article. Your material will be easier to read and more visually appealing with the addition of photographs. Click the enter key on your keyboard to start uploading a photo. Next, click the plus icon in the upper left corner to examine the different blocks. Pick the block labeled Image.
Upload your picture now. You have three options: use a URL to enter a picture from a website like Flickr, choose one from the WordPress media library, or upload one from your PC. Remember to include alt text with your image for search engine optimization and accessibility.
Your picture ought to appear in the block when you’ve finished this step. This procedure may be repeated as needed. If your post is lengthy, we advise including a few photographs to break up the text and improve readability.
Connecting Links
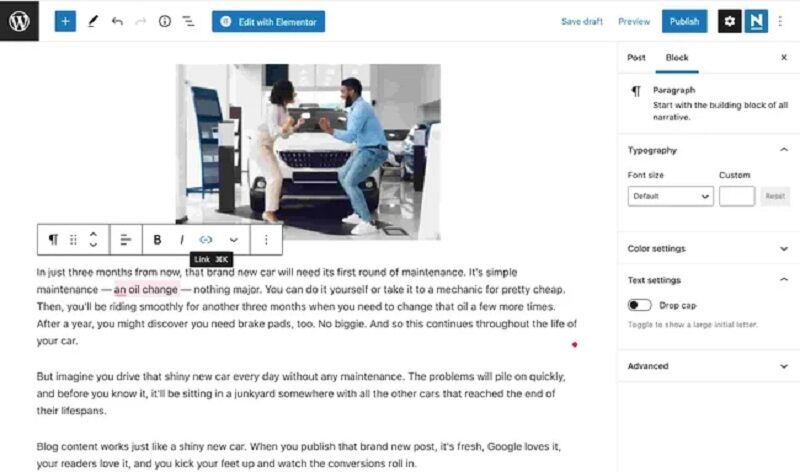
Including links in your blog article is a crucial step in improving its quality. The anchor text is also crucial for SEO as it informs site crawlers about the topic of the linked page.
Adding hyperlinks to your text in WordPress is simple. There are two ways you can proceed. Selecting the text you want to link to is the first step. Next, locate the menu box that is floating and click on the link icon that is indicated in blue below.
In the box that displays, enter a URL.
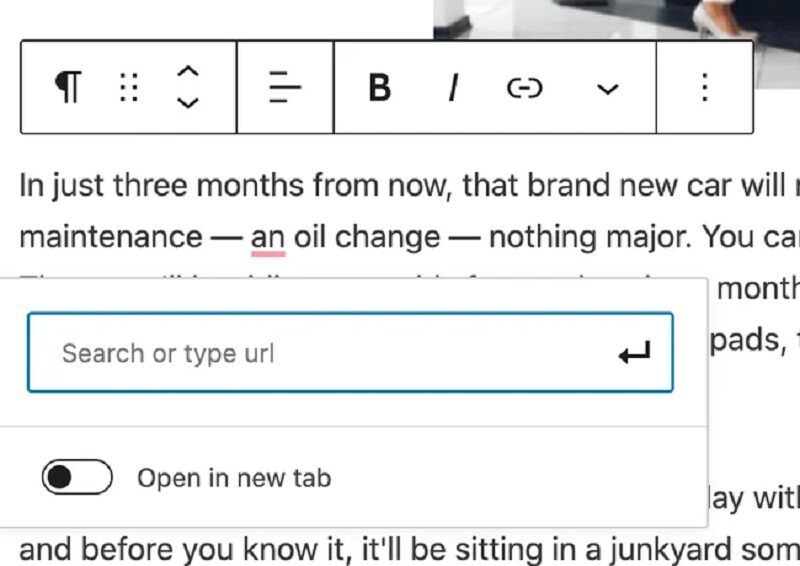
Press Enter to add the URL. And presto you’ve succeeded.
- Adding hyperlinks with a keyboard shortcut is simpler and more direct. Select the text you want to link to first.
- Next, use the keyboard shortcuts Command+K (Mac) or Control+K (PC) to open the box and enter your URL.
3. Structure the article
Warning: The organization and quality of writing of your information are equally vital. If you don’t style your content, large text blocks may overwhelm your visitors and cause them to rapidly abandon the website, which will lower your bounce rate. This is the post-formatting guide.
Headings
Use headers to keep a blog article organized. Headings use a hierarchy to communicate to the reader as well as search engines what is important on the page. Both your readers and search engines benefit from increased readability and search engine visibility. It also enables your readers to read at a more comfortable pace. Not to mention how much nicer it looks aesthetically for your blog article.
This is how it operates: A page’s title, or H1, is located at the top of the hierarchy of the page. A blog entry has just one H1. You run the risk of confounding both your reader and Google if you add more. Put differently, don’t do that.
Subheadings are the H2s. One, two, or more of these may be present in your post. Next in the hierarchy of a blog article are H2s. They always appear below an H1, so it’s a good idea to attempt to include the keyword in at least a couple H2s without keyword stuffing, of course, if you’re trying to rank for it on Google. H3s always come after H2s in a similar manner. Consider an H3 to be a subclass. The following headers have the same format.
Images
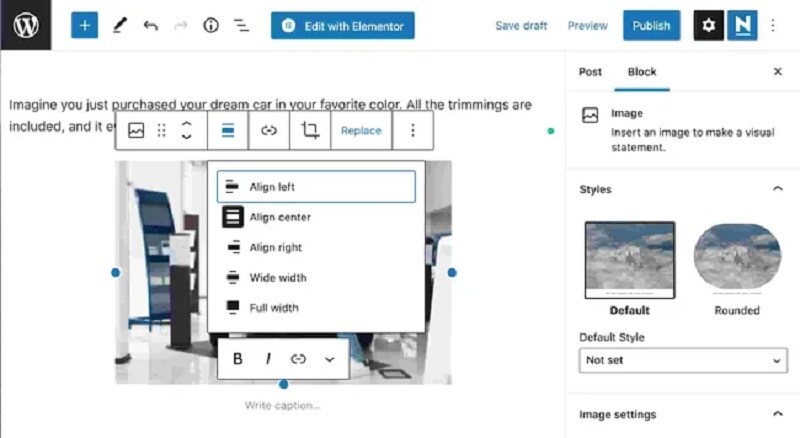
Remember to correctly style your images so that viewers may easily explore your blog content. WordPress makes it simple to format photos. This is the method.
Locate the floating menu box by selecting your image. The format button, which has three horizontal lines, should then be selected. Next, decide on the alignment that best suits your image. Let’s continue to arrange the photographs in our blog post in the middle here.
4. Check out the post beforehand
For the best possible user experience, you have included formatting, links, photos, and content. It’s time to check out your content before it is published. You’re practically there. See? It’s not as hard to learn how to make a WordPress blog as it might appear!
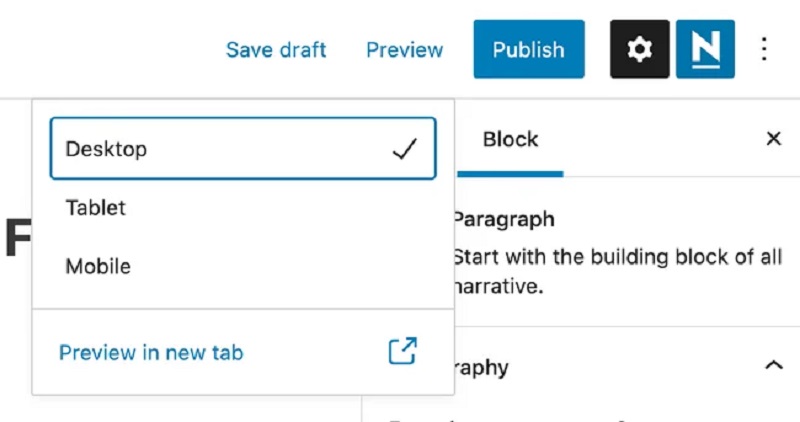
In the upper right corner, first, click the Preview button. Next, select if you like to view a preview of the article on a desktop, tablet, or mobile device. Here, we selected Desktop. Choose “Preview in a new tab” as the last option.
Check your post for any mistakes. Simply return to the editor tab and, if you see any changes that need to be made, make them.
Check your post for any mistakes. Just go back to the editor tab and make the appropriate adjustments if you spot any.
Congrats once everything appears to be in order! It’s time for you to write your very first WordPress blog entry. It’s time to publish a preview of your content now.
5. Post the article
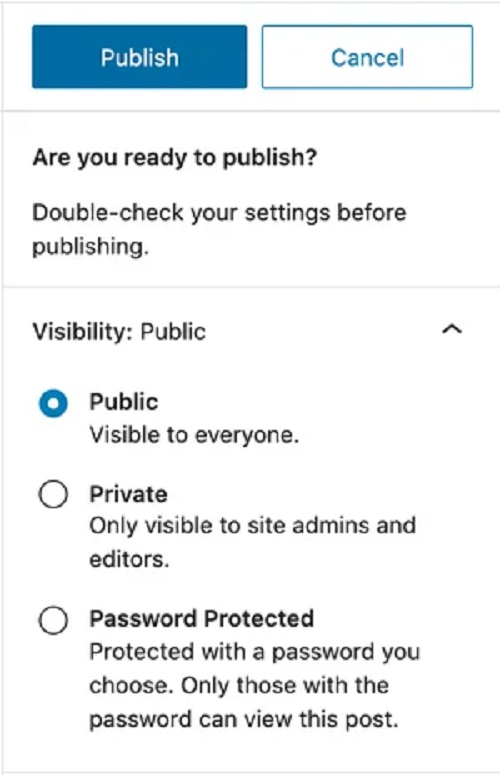
To publish the post publicly, click Publish in the top right corner.
You’ll be presented with a few publication options; choose Public if you want this post to be publicly accessible.
Make a Plan for a Future Time or Date
The next choice you have is whether you want the post to go out immediately, or when it should go out later. It can be published now or at a later time than you specify. Your blog post will automatically go online on the specified date and time if you schedule it. This would be really helpful if you have an editing calendar that you are following.
Include Tags
At last, you will be able to include tags in your article. These let people browse through your content based on related subjects. As this is optional, you can leave them empty if you don’t already have a method in place for categorizing tags.
How to Write Excellent WordPress Blog Posts
1. Select a subject
The topic of your blog must be decided upon before you can begin writing. Since your blog will probably be an extension of your company, think about the kinds of things that your website’s visitors could find interesting. There are still additional things to take into account even if that helps focus your list of possible themes. Selecting a topic that is both relevant to your organization and industry and sufficiently wide to allow for further exploration is crucial.
When choosing a blog post topic, keep your intended readership in mind. Consider the job titles (or positions) and specific demands of your audience, as well as what might appeal to them. For example, even though you are interested in trying out different fitness regimens, your audience probably won’t care if you own a tiny business selling amusing dog collars. Check how it relates to your brand and business.
2. Select a hosting company and configure your domain
WordPress is flexible when it comes to hosting your blog and offers you the advantage of using a robust content management system (CMS). It is a fact that there are far more hosting companies out there, so when you are selecting your hosting company you’ll have to ponder what things are a priority to you.
There are several options for configuring it. First, as was already established, blogs are websites in and of themselves. If your company falls under that category, you will need to register a root domain, such as yourblog.com. Nonetheless, a lot of companies choose to start a blog that is housed in their own portion of their website.
You have two choices if you want your blog to be linked from the homepage of your business. It is possible to create subdirectories or subdomains. Subdirectories are sections inside your domain that correspond to certain websites.
3. Choose and modify your theme
When you install WordPress, your blog is running with the default theme. Presume WordPress is installed on the most recent version of the program. Then Twenty Twenty-Two, a simple and lightweight theme that you may personalize using the Gutenberg editor or any WordPress page builder, will be the default theme.
Although this design could be ideal for your site, it might not be suitable for other blogs. Say you’d prefer a more distinctive theme. The WordPress theme directory and other third-party markets provide hundreds of free and paid WordPress themes that you may select from if you want more color, sidebar, background, Google Font, and layout choices.

You might have to pay for a theme if you want to locate one on a third-party marketplace, but it can be worth it to provide your visitors a better user experience. Stick with one of the free themes WordPress provides if you want to launch your blog for free.
4. Make a schedule for editing
You’ll also need to learn how to produce and publish all of your material when you start writing. Which kinds of material are you planning to publish? How is the content pipeline set up for you? What steps are included in the editing process? Is every content piece subjected to a rigorous editing and approval process? What is the frequency of your posts and the number of weekly content pieces you plan to publish? When will your postings be updated? What role does SEO play in this?
You may make an editorial schedule to help you stay organized and avoid becoming overwhelmed by these questions.
Your content producers may better organize and manage their workload with the aid of an editorial calendar, and a visual workflow. It will be your go-to tool for managing tasks, authors, editors, content kinds, distribution channels, deadlines, and—most importantly—publish dates.
5. Make excellent material
It’s easier said than done, we’ll acknowledge that. However, maintaining a successful blog requires regular production of excellent material. Even the most beautifully designed blogs will fall short of drawing in and keeping readers if their content is lacking.
Although it might seem obvious, there are a lot of stages involved in producing great content. There are several aspects of content development, including grammar, spelling, headers, graphics, and keywords.
Research on Keywords
Keyword research comes next, once you’ve selected which subjects to cover and developed your buyer personas. You’ll be able to tell if these subjects will interest a wider audience by doing this. You may determine whether it’s worthwhile to put up the effort to develop WordPress content on a particular keyword phrase by conducting keyword research.
Readability
The next step after selecting a theme for your blog is to create digestible content that entices and retains viewers. Make sure to reduce lengthy phrases or paragraphs, steer clear of passive language, include headers and subheadings, and utilize transition words in your posts to make them as readable as possible for the majority of site visitors.
Images
Incorporating visuals further improves the reading experience. Adding pictures to your material increases its memorability and engagement.
Conclusion
In the end, Start a WordPress Blog can be a really satisfying activity. Following the procedure that has been discussed in this guide, you will be in a position to set up your weblog, post your opinions, and even perhaps make some money from your weblog. Do not forget to make valuable posts, communicate with the readers, and update yourselves with the developments in the blogging world. So get on board that train, keep on pushing, and see your blog grow and blossom to the next level. Regardless of whether you are a blogger for fun, a business person, or a professional, blogging on WordPress provides that social outlet. Therefore, you can now proceed and make the leap and start this blogging adventure today.
More Reading:-
A Full Tutorial on How to Create a Website Free of Cost
Which Is Better for Your E-Commerce Website Prestashop vs WordPress?